How To Communicate Between Docker Containers
You’ve gone through the quickstarts and you’ve run your first Docker containers. But now you’re struggling to understand how to run more than one container at the same time. If Docker containers are isolated, then how the heck do they communicate with each other?
Modern apps consist of different components that need to communicate with each other.
In the real world, beyond the realm of the simple hello-world tutorial, running just one container isn’t enough for most apps. A modern application typically consists of a few components – such as a database, a web server, or some microservices.
So if you want to run all of your components in containers, how can the applications talk to each other?
How do containers communicate with each other, if they’re supposed to be isolated?
In this article, we’ll look at simple communication between Docker containers, when they are running on the same host (which is sometimes called single-host networking).
How do containers communicate?
First, a quick overview! Although containers have a level of isolation from the environment around them, they often need to communicate with each other, and the outside world.

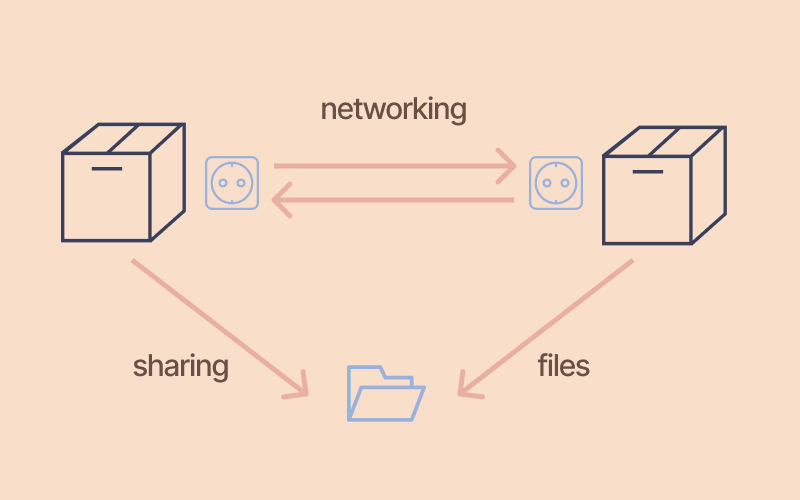
Networking or file sharing?
Two containers can talk to each other in one of two ways, usually:
-
Communicating through networking: Containers are designed to be isolated. But they can send and receive requests to other applications, using networking.
For example: a web server container might expose a port, so that it can receive requests on port 80. Or an application container might make a connection to a database container.
-
Sharing files on disk: Some applications communicate by reading and writing files. These kinds of applications can communicate by writing their files into a volume, which can also be shared with other containers.
For example: a data processing application might write a file to a shared volume which contains customer data, which is then read by another application. Or, two identical containers might even share the same files.
File sharing is great, but…. for this article, we’ll look at applications that use networking as the primary way they either expose or consume services.
We’ll talk about how to set up a network, which allows Docker containers on the same host to communicate with other.
Communication between containers with networking
Most container-based applications talk to each other using networking. This basically means that an application running in one container will create a network connection to a port on another container.
For example, an application might call a REST or GraphQL API, or open a connection to a database.
Containers are ideal for applications or processes which expose some sort of network service. The most well-known examples of these kinds of applications are:
-
Web servers - e.g. Nginx, Apache
-
Backend applications and APIs - e.g. Node, Python, JBoss, Wildfly, Spring Boot
-
Databases and data stores - e.g. MongoDB, PostgreSQL
There are more examples, but these are probably the most common ones!
With Docker, container-to-container communication is usually done using a virtual network.
Building your (Virtual) Network
If you are running more than one container, you can let your containers communicate with each other by attaching them to the same network.
A Docker network lets your containers communicate with each other
Docker creates virtual networks which let your containers talk to each other. In a network, a container has an IP address, and optionally a hostname.
You can create different types of networks depending on what you would like to do. We’ll cover the easiest options:
-
The default bridge network, which allows simple container-to-container communication by IP address, and is created by default.
-
A user-defined bridge network, which you create yourself, and allows your containers to communicate with each other, by using their container name as a hostname.
Default bridge network (easiest option)
The simplest network in Docker is the bridge network. It’s also Docker’s default networking driver.

A bridge network allows containers to communicate with each other
Source: Vektorarte/Freepik
A bridge network gives you simple communication between containers on the same host.
When Docker starts up, it will create a default network called… bridge. 🤔 It should start automatically, without any configuration required by you.
From that point onwards, all containers are added into to the bridge network, unless you say otherwise.
In a bridge network, each container is assigned its own IP address. So containers can communicate with each other by IP.
So let’s see an example of using the default bridge network.
How to use the default bridge network
Here’s how to use the bridge network to get two Docker containers on the same host to talk to each other:
-
Check that the bridge network is running: You can check it’s running by typing
docker network ls. This should show thebridgenetwork in the list.$ docker network ls NETWORK ID NAME DRIVER SCOPE acce5c7fd02b bridge bridge local a6998b3cf420 host host local d7f563b21fc6 none null local -
Start your containers: Start your containers as normal, with
docker run. When you start each container, Docker will add it to thebridgenetwork.(If you prefer, you can be explicit about the network connection by adding
--net=bridgeto thedocker runcommand.) -
Address another container by its IP address: Now one container can talk to another, by using its IP address.
You’l need to know the IP address of the container - check the little box below to find out how.
How do you find out the IP address of a Docker container?
To find the IP addresses of a container, look at the output of the docker inspect command:
$ docker inspect <container_id> | grep IPAddress
            "IPAddress": "172.17.0.2",
Example
Here’s a complete example. I’ll start an nginx container. Then I’ll start a busybox container alongside nginx, and try to make a request to Nginx with wget:
# Start an nginx container, give it the name 'mynginx' and run in the background
$ docker run --rm --name mynginx --detach nginx

# Get the IP address of the container
$ docker inspect mynginx | grep IPAddress
            "IPAddress": "172.17.0.2",

# Or, if you have 'jq' installed - here's a funky way to get the IP address
$ sudo docker inspect mynginx | jq '.[].NetworkSettings.Networks.bridge.IPAddress'
"172.17.0.2"

# Run busybox (a utility container). It will join the bridge network
$ docker run -it busybox sh

# Fetch the nginx homepage by using the container's IP address
busybox$ wget -q -O - 172.17.0.2:80
<!DOCTYPE html>
<html>
<head>
<title>Welcome to nginx!</title>
<style>

# Voila! The nginx homepage!
How to check if a container is in the bridge network
If you want to see how all this magic works, you can check which containers are in a Docker network.
Use the docker network inspect bridge command. This will show you the containers currently attached to the bridge network:
$ sudo docker inspect bridge
...
    "Containers": {
        "1cdc34001e9f5b109836d...": {
            "Name": "vibrant_tesla",   # This is my busybox container
            "EndpointID": "6d51e27f9277bf2...",
            "MacAddress": "02:42:ac:11:00:03",
            "IPv4Address": "172.17.0.3/16",
            "IPv6Address": ""
        },
        "dbb6b814d0f11bfcad11e...": {
            "Name": "mynginx",         # This is my nginx container
            "EndpointID": "aa65052c8c4e26fd...",
            "MacAddress": "02:42:ac:11:00:02",
            "IPv4Address": "172.17.0.2/16",
            "IPv6Address": ""
        }
    },
...
The default bridge is….. fine…. but it means every container can see every other container.
What you probably want is: a user-defined network, so that you can be more granular about which containers can see each other.
Let’s look at that option.
User-defined bridge: the more sensible option
If you only use the default bridge network, then all your containers can see and access other containers’ ports. This isn’t always what you want!
Another “feature” of the default bridge network, is that containers can only talk to each other by their IP address. Obviously, this is a bit brittle, because IP addresses can change.
The second option, the user-defined bridge, lets you have a bit more control.
Get more control, with a user-defined bridge
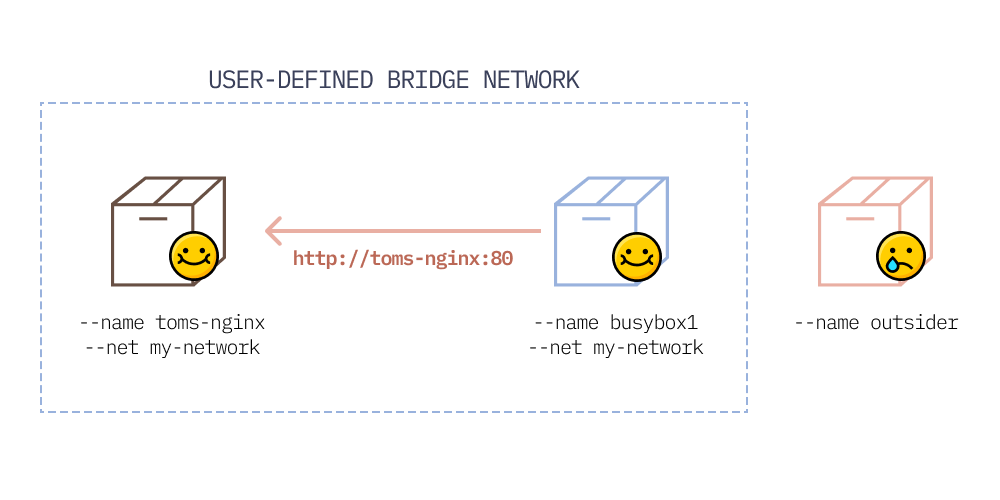
To let Docker containers communicate with each other by name, you can create a user-defined bridge network. In a user-defined bridge network, you can be more explicit about who joins the network, and you get an added bonus:
…containers can be addressed by their name or alias.

In a user-defined bridge network, you control which containers are in the network, and they can address each other by hostname
Aliases, what are they then?
Docker gives each container a unique name, but you can choose your own name or alias for a Docker container when it starts.
You can choose a more friendly name (e.g. my-nginx, or myapp-dev).
When these containers are joined to the user-defined bridge network, they can address each other by this name.
This means you don’t need to worry about keeping track of containers’ IP addresses, which can frequently change.
Example: if you run a database in a container, and give it the name mydatabase, then your app in a container can address the database using the hostname mydatabase. If you’re using MongoDB, the connection string might look like this: mongodb://mydatabase:27017
How to create a user-defined bridge network
To allow two Docker containers on the same host to communicate with each other by name:
-
Create a user-defined bridge network: Create your own custom bridge network first using
docker network create. Under the hood, Docker sets up the relevant networking tables on your operating system.For example, I’m going to create a network called
tulip-netfor applications about tulips: 🥀docker network create tulip-net -
Start a container and connect it to the bridge: Start your container as normal. Add it to your user-defined bridge network using the
--netoption, e.g.--net tulip-net.docker run --rm --net tulip-net --name tulipnginx -d nginx -
Address another container, using its name as the hostname: When two containers are joined to the same user-defined bridge network, one container is able to address another by using its name (as the hostname).
# Start a busybox container so that we can test out the network
$ docker run --net tulip-net -it busybox sh

# Use 'wget' inside busybox, using the container name as the hostname!
busybox$ wget -q -O - tulipnginx:80
<!DOCTYPE html>
<html>
<head>
<title>Welcome to nginx!</title>
...you get the picture....
Can you connect an existing container to a network?
Yes, you can! If you already have a container running, you can to connect it to your new user-defined bridge network without having to restart the container. Use the docker network connect command. For example:
docker network connect tulip-net mongodb
Now Docker will connect the container mongodb to the network tulip-net.
And that’s user-defined bridge networking. It’s a great way to have a custom network set up, and isolation from other containers that aren’t in the network.
TL;DR
Too long, didn’t read? Here’s the gist:
-
For containers to communicate with other, they need to be part of the same “network”.
-
Docker creates a virtual network called
bridgeby default, and connects your containers to it. -
In the network, containers are assigned an IP address, which they can use to address each other.
-
If you want more control (and you definitely do), you can create a user-defined bridge, which will give you the added benefit of hostnames for your containers too.
Want to learn more? Containers Fundamentals is a 40-hour course from Linux Foundation that covers container networking, images, runtimes, storage, security and much more.
Happy networking!
