How I Created a Python Development Environment with Docker
I’m not a Python developer. (Well, not yet anyway. 😅)
But recently, I started out on creating a Python/Django application.
I had just one (large) problem: navigating the world of Python versions and dependencies.
I know I have to learn things like pip, easy_install and venv, but what’s the best practice? What’s the best way to install this stuff on my laptop?
Whenever you’re learning something new, doing all the initial setup work like this can be a drag.
In fact, it can be a drain on your energy, when all you want to do is open up an IDE and start coding. Personally, if I have to do too much of this stuff, I just get bored and move on to something else.
So, since I wanted to get something up and running quickly, I thought about creating a development environment using a tool that I already know: containers.
With a tool like Docker or Podman, I can create a containerised development environment, which contains everything I need to code my app, without having to install it all on my laptop.
It’s basically using a container as a single-purpose virtual machine. A VM that I can create again and again, whenever I need a development environment to work in.
Join me on this little journey as I show you how I did it.
Step 1: Declare Python dependencies
My first step is to declare all of my Python dependencies.
I’m going to do this in a requirements.yml file.
Later, we’ll use pip, the Python package manager, to read this file, and install all my requirements into the container.
So, since I’m writing a Django app, my ./requirements.yml looks like this. I’m also declaring a couple of other packages too:
Django>=3.0,<4.0
shortuuid>=1.0.1
gunicorn
Next step: write the Dockerfile to build a container image, with my requirements installed.
Step 2: Write the build instructions
We all love a nice Dockerfile.
I’m going to use a container as a virtual development environment. So I want to write a Dockerfile to build a container image, beginning with the version of Python that I want, and then add all of my dependencies into it.
My starting point is the python:3.9-alpine image on Docker Hub.
(It’s a “Docker Official” image on Docker Hub, so I have, uhhhhh, some confidence about its quality and security. Better to use this than an unofficial one.)
So here’s the first line of my ./Dockerfile:
FROM python:3.9-alpine
Then I change the working directory to /usr/src/app. This tells Docker where to run the remaining commands. So I add this command:
WORKDIR /usr/src/app
Next, I copy the requirements.txt file that I just wrote, and put it in the container. I run pip install, which will download all the packages I need. I add these commands:
COPY requirements.txt .
RUN pip install -r requirements.txt
And that’s all I need for my development environment. I’ve made sure that my requirements.yml is in there, and that Docker should run pip to install the dependencies.
Next, we’ll build the image.
Step 3: Build the image
So let’s build the image! This will create the image that we’ll use to spin up a container from.
With docker, type:
docker build -t myapp-dev .
Or if you’re using Podman:
podman build -t myapp-dev .
This will build an image called python-dev.
The next step is to create a container, and get coding!
Step 4: Run the container
So we have our container image, or Docker image, containing Python and the requirements that we need.
To start the environment, I run a container, and tell it to launch a command prompt (sh):
docker run -it --name myapp --rm \
    --volume $(pwd):/usr/src/app \
    --net=host myapp-dev:latest \
    sh
There are a few things going on this command, so I think they’re worth calling out:
-
I’m using a bind mount (
--volume ...), to make the current directory (PWD) on my host operating system also available inside the container. This will allow me to edit files on my host, and have them available inside the container, in real time.- If you’re using SELinux, you might need to add the
:zmodifier to the end, e.g.--volume $(pwd):/usr/src/app:z
- If you’re using SELinux, you might need to add the
-
I give the container a name (myapp), because I like to call my containers by their proper names! I also add
--rm, so that when the container terminates, it’ll be deleted (although my source code files will still exist on my host OS). -
I set
--net=host, which allows the container to share my host network. So, when I run my Python web site in the container, I will be able to access it on my host operating system, using the localhost address.
And now I can start my project!
Step 5: Doing the coding
Here’s a quick example of how I use the container as a development environment for Django apps.
I start by creating a Django project, running django-admin, inside the container shell:
# django-admin startproject mysite
# cd mysite/
# ls -al
total 16
drwxr-xr-x    3 root     root          4096 Mar  9 18:55 .
drwxr-xr-x    3 root     root          4096 Mar  9 18:55 ..
-rwxr-xr-x    1 root     root           662 Mar  9 18:55 manage.py
drwxr-xr-x    2 root     root          4096 Mar  9 18:55 mysite
Now I can edit the Python source files on my host operating system (e.g. with PyCharm or Visual Studio Code), and they’ll be instantly visible in the container.
Finally, I boot up the Django app, by running this command inside the container:
# python manage.py runserver
Which gives me a bunch of output:
Watching for file changes with StatReloader
Performing system checks...

System check identified no issues (0 silenced).

You have 18 unapplied migration(s). Your project may not work properly until you apply the migrations for app(s): admin, auth, contenttypes, sessions.
Run 'python manage.py migrate' to apply them.
March 09, 2021 - 19:03:00
Django version 3.1.7, using settings 'mysite.settings'
Starting development server at http://127.0.0.1:8000/
Quit the server with CONTROL-C.
And I will now be able to access the Django homepage on my host, using http://localhost:8000
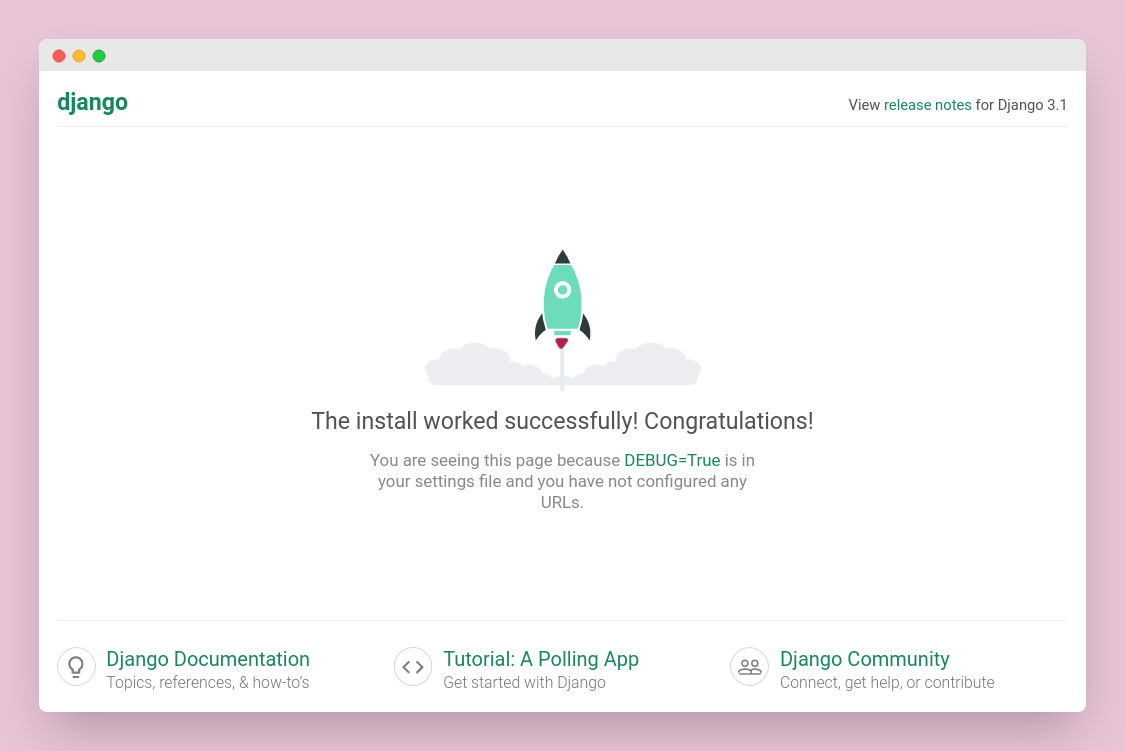
Django contained!
Mission accomplished!
Tidying up
When I’m done with the container, I just press Ctrl+C to terminate the Python process, and then Ctrl+D to exit the container entirely.
When I want to restart the development environment again, I can just use the same docker run command above.
Hope this has been helpful for you! Happy Pythoning :)